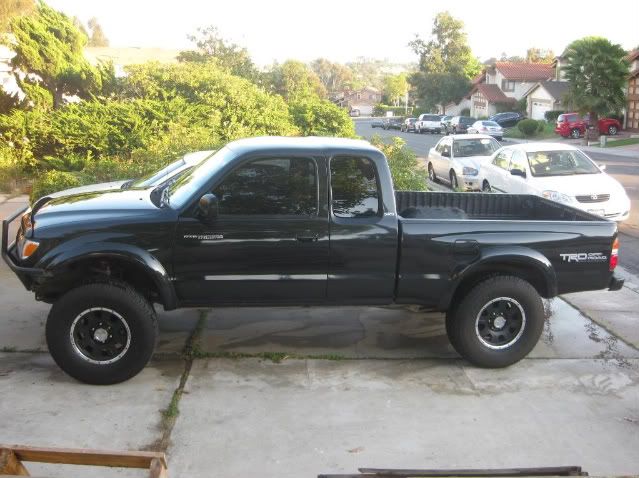
TTORA Forum banner

LT 4x4 04 double cab

167K views 584 replies 87 participants last post by  socalmoto  
#1 · (Edited)
Image

my first truck

Image

my new truck

I had orginally bought a tacoma xtra cab prerunner (my first truck) thinking I'd never really drive offroad and would never need 4wd. After getting the truck I actually took it offroad and loved it. I built a pretty ghetto bolt on bumper for it and made it mid travel up front but the 2wd wasn't cutting it rock crawling. I traded that truck in and got a 4wd double cab. I got a double cab because I always read about people selling their 2 door trucks when they had a family and need to fit a child seat in and what not, plus its cool having friends along.

My goal is to have a sweet ass truck that I can offroad on trails and in the dunes but still be functional because it is my DD and I use the bed frequently for work. Anyway, here are my plans for the truck...


Suspension-
Front:
Camburg LT kit , Custom Upper Arm
Fox 2.5 x10" Dual Rate Coilovers, shortened to 8" stroke
Fox 2.5 10" Triple Bypasses, shortened to 8" stroke
Fox 2.0 x 2.5" Bumpstops, shortened to 2" stroke

Rear:
Ford 9" Full Floater. Cone Hubs
(31 spline, detroit locker, 5.29 gears,seal #417349, o-ring 2-223 2-243)
Willwood Ulta-Lite calipers, .81 x 12.188 Rotors
All Pro 50T Pack w/ 12" Richer Racing shackles
Fox 2.5 x 16" triple bypass with custom layout (Outboard of Frame)
Fox 2.0 x 4" Bumpstops, shortened to 3" stroke

Fabrication-
Bumper
Front Diff Mount Protective Crossmember
Hitch
Front diff Skid
Engine Cage
Roll Cage
Boxed in Frame
Spare Tire Carrier


Other
Glassworks 6.5" Front fenders
Glassworks 6" Rear Fenders
Magnaflow Muffler (done)
Mickey Thompson Classic II powdercoated Black
Sliders
Front Tundra Brake Upgrade
Supercharger
2 Kragen HIDs
Remote Tranny Cooler
Ammo Cans


Here is a list of some links I used as reference on my build
Front LT installation
http://www.off-road.com/trucks4x4/article/articleDetail.jsp?id=186292
Rear Suspension:
http://www.trailslesstraveled.com/viewarticle.php?id=37
http://www.dezertrangers.com/vb/showthread.php?t=85240
Manual Proportioning Valve:
http://www.trailslesstraveled.com/article/rear-brakes-removing-lspv/
Service Manual:
http://www.ncttora.com/fsm/index.html
Mounting shocks outside of frame:
http://www.dezertrangers.com/vb/showthread.php?t=88249
OBD Codes:
http://www.ttora.com/wiki/index.php/OBDII_Trouble_Codes
Rear shock angle:
http://www.dezertrangers.com/vb/showthread.php?t=64624
Steering rack bushing replacement:
http://www.4x4wire.com/toyota/maintenance/steering_bushing/
Tundra brake conversion:
http://www.ttora.com/forum/showthread.php?t=51597&highlight=brake+conversion
Tire Carrier:
http://www.ttora.com/forum/showthread.php?t=70083&highlight=TIREGATE
http://www.tacomaterritory.com/forum/showthread.php?t=32433&highlight=tire+carrier&page=2

Notes:
Front Coilover
6"x500#/16" x 800#
3,3 compression, 50 Rebound

Front Bypass
4,3,2 compression, 70 Rebound

Rear Bypass
3,2 compression, 30 Rebound
 
#2 ·
7/11/09
Here's a few pics of my bumper build. Sorry for the crappy cellphone pics. I wanted to tie my skid plate to the diff skid but I would have lost some clearance the way I was planning on doing it so I'm just going to do them seperate. The tube that protects the radiator is .120 DOM and the rest is thin wall chromoly. I wanted the bumper to be able to crunch if I get in an accident for saftey reasons and also because I'd rather have my bumper give than my frame.

Image


Image
 
#3 ·
11/7/09
I mounted 6.5" Glassworks fenders this weekend in preparation for LT next weekend and the came out pretty good however it was a lot more shaping and sanding than I had imagined. I couldn't get the stock mounting for the turn signal to work in the new ones. It only mounts using that screw from the top of the headlight and a bracket that comes off the side of the headlight. How are you guys doing it? i also put in a magna flow exhaust and it sounds pretty good

Image

pretty goofy looking w/ stock width

Image

from this

Image

to this

Image

welds came out pretty good but Im not baller enough to weld while I walk around it so I had to start and stop a bunch of times
 
#4 · (Edited)
11/13/09
I got all my parts in for LT (thank you poly pro). I got the Camburg LT kit and was originally going to go w/ SAW shocks but I couldn't get them in by friday so I switched to FOX (Im inpatient). I also got the total chaos spindle gussets. I started the install friday afternoon and worked til about midnight but only got this far:
Image

I didn't have the correct size socket to take out my CV's or get the lower ball joint back in. Also, the upper arms weren't tapped for the zerk fittings so I thought I had to tap them before I could move on. I ran around all of saturday morning searching for the right tap only to find out the fittings go in without having to tap the holes. There were absolutely no instructions for the camburg kit so I didn't know. I worked all of Sat and half of sunday and limped my way to an alignment shop. The tires were squealing everytime my wheel wasnt completely straight. here are some pics from the install:
Image

Image

Image

ball joint tool haha
Image

I got tired of the ball joint moving while I was trying to press it out
Image

spindle gusset
Image

LT vs stock
Image

bump
Image

droop
Image

Poser pic

I also Upgraded my brakes to the tundra S13WL. I had to grind my lower are because the rotors were hitting them. I painted blue with duplicolor caliper paint. It actually matches my rings pretty close
Image

clearance after grinding
Image

Image

Booya
 
#10 ·
11/28
This week I trimmed my fenders so they wouldnt rub at bump. I relocated my windshield wiper fluid pump higher so it wouldn't get destroyed and put my stock bumps on the frame until I got actual bumps stops. Lastly, I made gussets to go on the outside of my spindle. I heard they were weak so I decided to reinforce it before I broke it.

Before:
Image


After:
Image

Image


Bump stops:
Image

I drilled and tapped the frame and they screwed right in. M10-1.25

Spindle Gussets
Image

templates

Image

plasma cut then grinded

Image

Welded on and painted

Image

There's just enough room to get an end wrench in there
 
#12 ·
Your truck is a great platform. I had an 04 extra cab and bought a double cab because I was afraid of the same thing you were about building it up and having to sell it due to family needs.

Great build.
 
#17 ·
I found the shocks I need on dezertrangers today used and a bunch cheaper than the ones I just ordered so I canceled my order and picked them up after work. Since I am putting the shocks on the outside of the frame I was a little worried that they were piggyback and not resi because the overall width is bigger. The width of the shock in the orientation I need it is just under 5", the gap between my frame and tire is just under 4", and I am adding 3" per side with the tundra axle. That leaves about 2" extra. I will probably favor the frame side since the tire will move closer on articulation. Here are the shocks
Image


I also took off my bed and made some sweet temporary mud flaps to make the popos happy.
Image

Image


Here is the clearance on the stock axle so imagine this but with 3 extra inches
Image
 
#18 ·
when your drooped out on one side and compressed on the other im sure that your rub those shocks like a bastard even with the tundra axle.
 
#26 ·
Yeah they do haha. Have you read this thread?
http://www.ttora.com/forum/showthread.php?t=127116

I don't mind notching the frame if it makes the shock clear but I wouldn't want to notch more than like an inch and a half. If I sell these shocks I just bought and bought new ones I could specify where I want the bypass tubes and it would be a remote resi so that would shave off over an inch.
 
#28 ·
I did a ton of work this weekend. My parents let me borrow their car for a week so I took that oppurtunity to decommision my truck. I started off by welding in a temporary crossmember,taking out my spare tire crossmember, and pulling the gas tank. From there I started boxing the frame. I ended up doing in three pieces because it made it a ton easier. I've only done 2/3 of each side because I have to wait to take out the gas tank crossmember to keep my frame from springing. I made cardboard templates and got the CNC plasma cut out of 1/8" plate. Here's a few pics

I tacked it in place then ground the edges to make it flush with the frame before I welded
Image

One section welded up
Image


After that I had to cut off stock brackets and I ended up having to cut off my sliders because they mounted right were the front spring hanger needed to go. Im going to tuck them in tighter when I put them back on

Cutting out brackets
Image


From there I started locating the spring hangers and shackle mount. I took the length of the spring from the hole where the axle mounts to the front eye to get a rough locating measurement (something like 28" i think). I took that measurement to go from the stock bump bracket on the frame to the eye of the hanger. I tacked the front hanger then used the magic 52.5" to located the rear. I have F67's and a 12" TC shackle FYI. I cycled the leaf to see where the axle mount would be at bump. It ended up being .25" too far forward so I moved it back. I also remounted the rear shackle at 52.5625 to give a little more clearance between the leaf and the bottom of the frame at bump. To get the location of the other front hanger I copied the measurements from the back of the frame and also from a random hole towards the front of the frame. I got it to within a 1/32", I think that should be okay. I tried using the cab mount to locate it but I found out that they were actually 1/16th off of each other. Everything cycles really good but I ended up forgetting to get the travel numbers after all that haha. Here's a few pics

Spring at bump
Image

Spring under its own weight (the frame sprung in a little after I removed the bumper and hitch) The shackle will be centered once I get a crossmember back in there
Image

Shackle at bump (I think the bottom of my frame is bent a little)
Image

Both springs in
Image

Image


I'm pretty happy with all the progress I made this week. I only ran into a few minor problems. I didn't know that the shackles didn't run parallel to each other. The mount to the frame is wider than the leafs and the shackles were on upside down so there were massive gaps at the bushings. I also wasn't expecting to have to cut off the sliders. I'm picking up my rear axle from getting a trusset at the Truck Shop today so I'll be able to cycle it with an axle and check my clearance for the shocks. I also need to get a new welder to weld all the thicker stuff. Everything is just tacked now. How does it looks so far?
 
#30 ·
1/11-1/17
I did a ton of work over the last week. I was hoping to be done by today but I'll definitely have to carpool this week. Here are some pics of the progress

Center crossmember added. I plated the frame with 3/16" where they meet. I'm going to add some gussets soon
Image

The end of the frame sprung in when I took off the bumper so I straightened it using a bottle jack
Image

Crossmembers in and painted. The back crossmember is just a temporary one until I figure out what I want to do for the rear bumper and spare tire carrier
Image

I decided to notch the frame to make a little extra room for the shock. I used 3/16" on the outside, top, and bottom, and then 1/8" on the inside. I took out about 1"
Image

Image

Image

Image

To find out where I needed to mount my shock I drew two arcs on a board by putting a sharpie through the eye of the shock. The blue arc is the compressed length of the shock (+.5" so it wouldn't bottom out) drawn with the axle at bump and the red arc is the extended length (-.5" so the shock would over extend) drawn with the axle at full droop. the green arrow indicates where they intersect and where I need to mount the shock
Image

Checking for clearance on articulation
Image


Image

There is a ton of room which sucks because I ordered custom shocks last week
Image

I made the shock hoop from 1.75" .120 wall DOM. I plated the frame where they meet with 3/16" plate. I plan for the shock to come up directly under the hoop and plate the sides
Image


Image

I got the limit straps mounted as well
Image


Image


I still have a lot to do before it's drivable but I'm hoping to have it there by this weekend.

To do:
Finish Pside shock hoop
Tie hoops together and add gussets
Add crossmember gussets
Set pinion angle and weld on the leaf perches
Weld on shock tabs and finish welding limit strap tabs
Weld on shackle frame mount gussets
Trim and reinstall gas tank crossmember and gas tank
Brakes

Does anyone know if I can drive with different gearing in my front and back as long as I don't engage 4wd? I plan on doing it ASAP but I'd rather wait until the weekend to regear the front.

Also, what did I do wrong when I put my leaf packs back together?
Image

Image

They didn't look like this before I took them apart. Thanks