TTORA Forum banner

R&R Upper and Lower Ball Joints

102K views 48 replies 14 participants last post by  PlayDoh  
#1 · (Edited)
Don't know if this is the correct folder, but if it's not, please move it to a more appropriate one. My cousin Tony and I went over to help Keith (Meithkiller) replace the ball joints on his 96 Tacoma. The following relays our experience in this endeavor and is meant only to assist others who may decide to do it themselves. For those that decide to do this job themselves, you do so at your own risk. So please be careful.

We used a copy of the factory service manual, a Haynes Repair Manual and the following link to guide us since none of us had ever done ball joints before:

http://www.parksoffroad.com/tacomamods/upballjointout/balljoint.htm

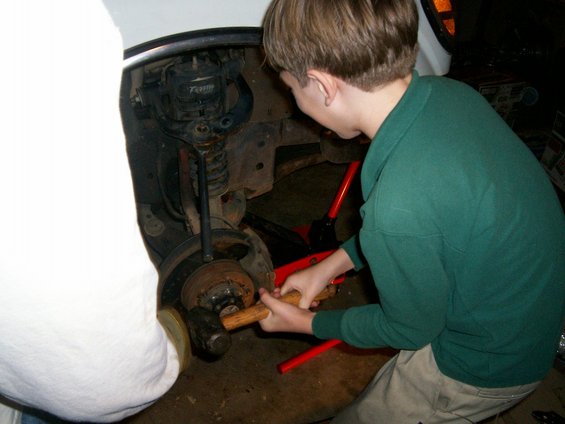
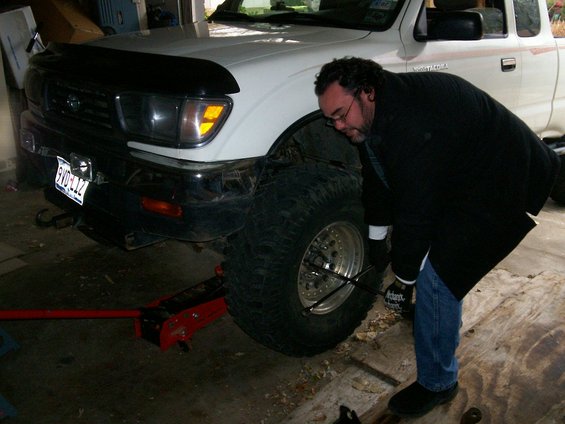
After putting the manual trans in first, engaging the parking brake and chocking the rear wheels, we loosened the lug nuts. Here's my cousin Tony jumping in at that task:

Image


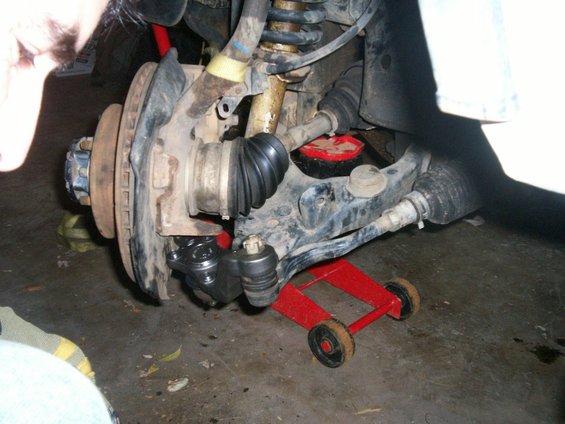
After raising the vehicle with a floor jack and placing jackstands underneath to support the truck, we removed the front wheel and decided to start with the lower ball joint:

Image


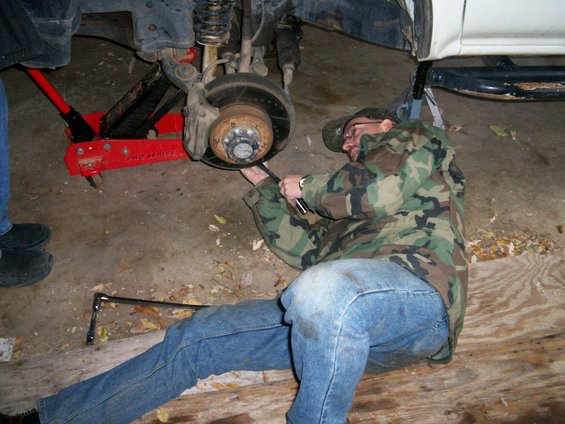
Keith began by loosening (but not yet removing) the four lower ball joint bolts (the ones that connect the lower ball joint plate to the lower control arm) and the lower ball joint castle nut (after removing the cotter pin):

Image


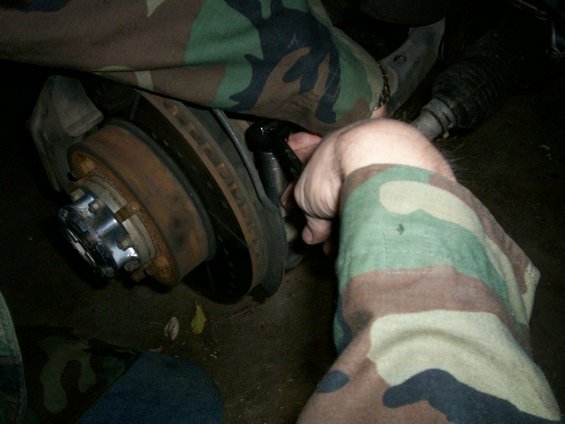
After removing the cotter pin on the tie rod end castle nut, the castle nut was then removed from the tie rod end:

Image


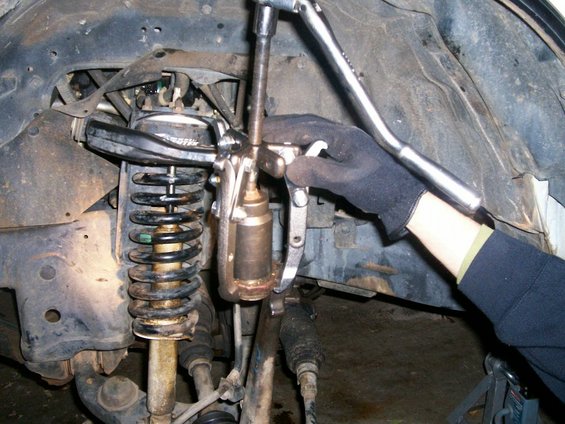
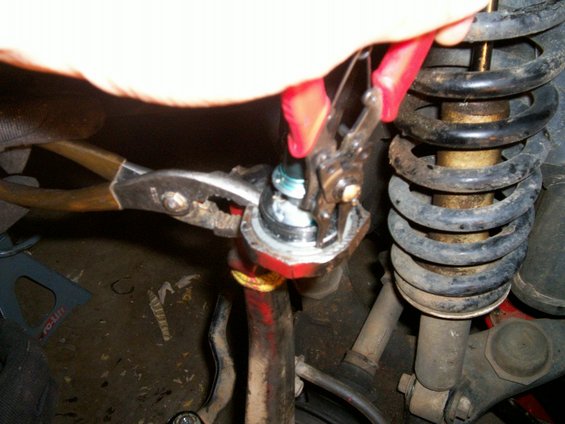
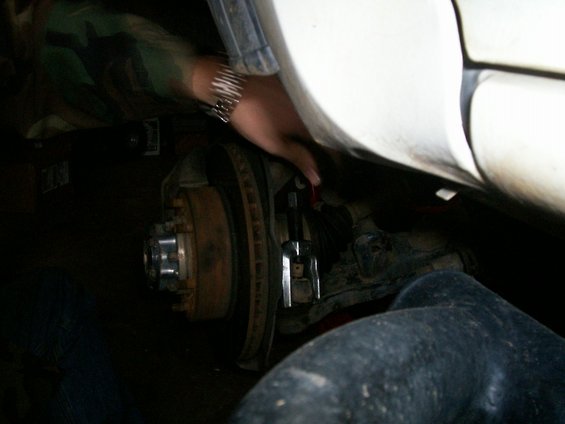
We then fastened a two jaw puller onto the tie rod end threaded stud to press it out:

Image


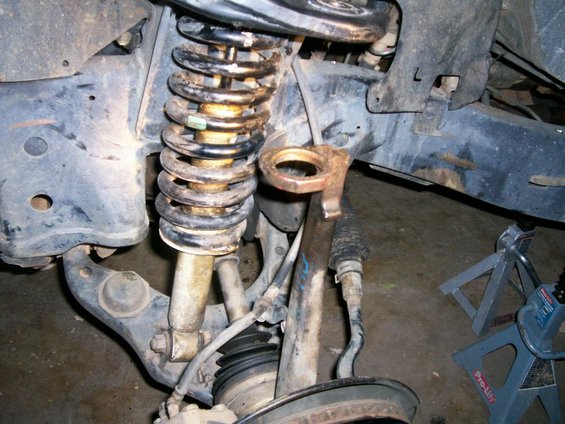
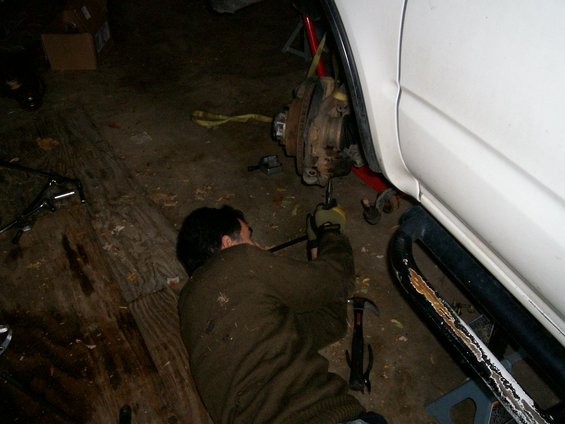
Next, it was time to remove the four lower ball joint bolts and lower ball joint castle nut:

Image


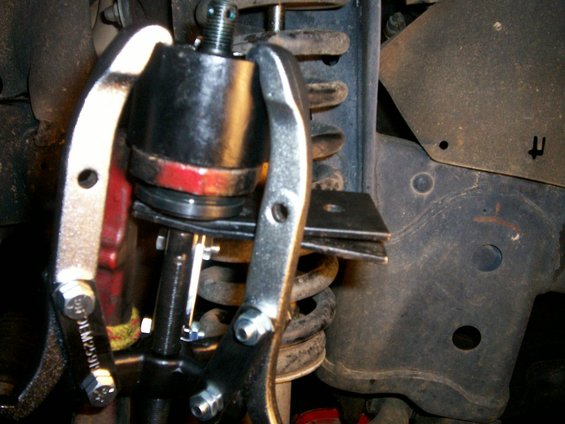
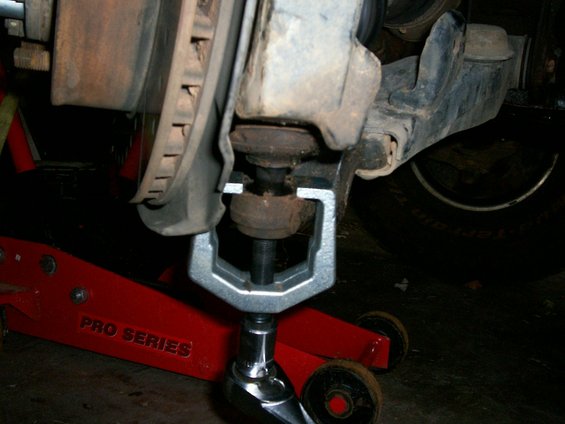
We then fastened a bigger two jaw puller (bigger than the one used for the tie rod end) to remove the lower ball joint:

Image

Image


The two jaw puller worked great and easily removed the lower ball joint from the lower control arm. Here's a pic of the old lower ball joint next to the new lower ball joint (pics show the passenger side lower ball joints):

Image


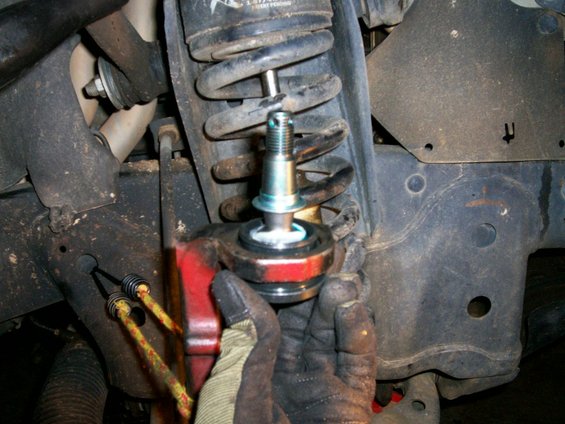
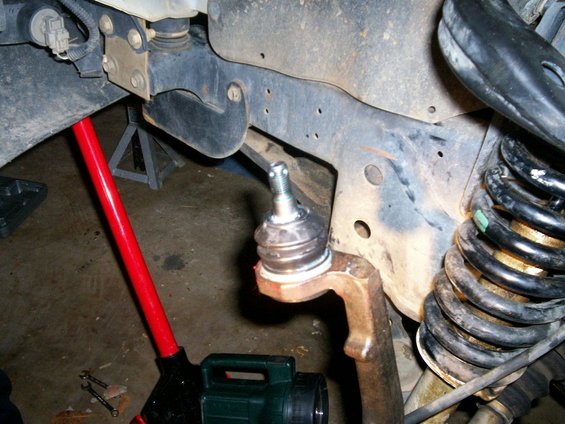
We then installed the new lower ball joint onto the lower control arm. It didn't appear that any additonal pressing was required to install it since it kind of got "pressed in" by tightening the castle nut on the new lower ball joint threaded stud. Here's a shot of it installed with the tie rod end also attached to it:

Image


(Edited for new pics)
 
#2 · (Edited)
So far so good, but the worst was yet to come. For us, the upper ball joint was much more difficult than the lower one. We first loosened and removed the castle nut on the threaded stud of the upper ball joint connecting it to the upper control arm (after removing the cotter pin of course). Once removed, we expected the threaded stud to easily separate from the upper control arm, but that was not the case. We hammered the top of the stud to no avail (ruining the stud in the process, but since we were replacing it we didn't care). We tried to fit the bigger two jaw puller in there, but the jaws were too narrow and not long enough. We tried a three jaw puller, but it just wasn't grasping the upper control arm well enough. What finally worked was hammering a tie rod fork through the boot portion of the ball joint right underneath the upper control arm (note - this will destroy the boot) and, while using that fork as leverage, pounding the top of the threaded stud with a small sledge. This worked great. Unfortunately, we forgot to take pics of this process. - Update, we got new pics of the passenger side -

Here are some pics of the process when we did the passenger side the following day. Note, however, the tips given in the subsequent posts in this thread from others who've found easier ways to do it. I will say, though, that this second time around it was pretty easy to pop it out of the upper control arm. Anyway, here are pics of us "pickle forking" it out of there. Just remember to also hammer the top of the ball joint stud while you're applying downward force on the pickle fork:

Image


Here's Keith's son, Wade, probably the smartest 10-year old I ever met, taking out some elementary school stress by wacking on the pickle fork in order to get it good and snug in there before applying the downward force and hammering on the top of the stud:

Image


Once the pickle fork was good and snug on there, we applied downward force on it while hammering the top of the ball joint stud. It easily popped right out, but like I mentioned above, please note the other posts below on other methods of popping it out:

Image


After separating it from the upper control arm, next came the difficult task of separating it from the knuckle/spindle. There was supposed to be a boot wire that needed to be removed in order to remove the boot, but to our surprise we didn't find one. After finding the snap ring that helps hold the ball joint to the knuckle/spindle, we struggled for a bit to get it off. We used snap ring expanding pliers and a flathead screwdriver to finally pry it out of the driver side. Here's a pic of us also using what looks like a dental hook instrument that Keith found in his tool box that helped remove it from the passenger side:

Image


Afterward came the fun part of pressing it out. We first used a three jaw puller and a 36 mm socket that fit over the ball joint and threaded stud:

Image


But we discovered that the pointy, threaded stud of the puller went right through the top of the square 1/2" hole of the 36 mm socket. Tony came up with the bright idea of putting a bolt through the square hole to keep the pointed end of the puller's stud from going through it. Since the new lower ball joint came with four new lower ball joint bolts, we decided to use one of those old bolts for this purpose. Here's a pic of the passenger side that shows what I'm talking about:

Image


It worked like a charm on the driver side, but when we tried it on the passenger side the next day, we discovered the pointy end of the 3-jaw puller stud was no longer pointy, but was instead dull and almost flat. This caused the stud to slip off the head of the bolt. So Keith came up with the idea of using a 1/2" to 3/8" drive adapter for the passenger side:

Image


After threading the puller for awhile, we finally observed the ball joint slowly but surely being pressed out of the knuckle/spindle:

Image


Here's the knuckle/spindle with the upper ball joint finally removed:

Image


Getting ready to place the new upper ball joint into the passenger side knuckle:

Image

Image


To press the new one in, we placed the three jaw puller upside down and used a steel plate underneath the new ball joint to keep the pointy, threaded stud from busting a hole through it. We also used one of the steel cups supplied in a Harbor Freight ball joint press so that the jaws of the puller could have something to grasp onto. The force of the puller managed to bend the plate and almost break through it, so we simply used another one on top of it:

Image


And here's a pic of the passenger side with two steel plates under the ball joint:

Image

Image


At one point while doing the passenger side, we decided to use a big heavy wrench in place of the steel plates underneath the ball joint to help press it in more evenly:

Image


This is what the new ball joint looks like once pressed into the knuckle/spindle and with the new snap ring in place. Note how the boot is still not on it:

Image


The snap ring was kind of tricky to get on. It's pretty stiff. We first slipped it on over the top. The snap ring expander pliers we had couldn't open the snap ring enough to slip it all the way on. So while I expanded it as much as I could, Keith took some big pliers and just snapped the other end of the snap ring onto the edge of the knuckle:

Image


The new upper ball joint comes supplied with two kinds of grease - one that you fill the boot with and another kind that you place on the bottom lip of the boot. The kind that you fill the boot with was whiter than the other kind and came in a blue bag. The kind that you apply on the bottom lip of the boot was slightly more yellowish and came in a clear bag.

Here's a pic of the boot with the supplied boot grease:

Image


Here's a pic of the boot filled with the grease. We used every last bit of the grease:

Image


Once we filled the boot with grease and applied the other grease on the bottom lip of it, we placed it over the ball joint's threaded stud:

Image


We then secured the boot with new wire supplied with the upper ball joint kit. The instructions said to wrap the wire around the bottom groove of the boot two turns and then to twist the ends together to tighten it. After twisting and tightening the wire, we cut the excess off and tried to bend the twisted part downward so that it wouldn't hit or cut the rubber boot:

Image


Afterward, we guided the ball joint's threaded stud through the upper control arm hole and tightened it down with the new castle nut supplied with the ball joint kit. We put a new cotter pin on (also supplied with the kit), tightened everything down with torque (including the four lower ball joint bolts after putting loctite on them), put the tire back on and tightened the lug nuts.

I'm sure there are a few things I've left out, and I'm doubly sure there are a few tips and tricks that would've helped make the process a little easier. The whole process took us awhile since it was our first time. Hope our experience helps any other folk wanting to tackle this job on their own.

(Edited for new pics)
 
#4 ·
Thanks, man! Were you the one who gave Keith the two jaw puller? Or maybe it was someone else, cuz your name came up ALOT while we were working on it - "How the heck did he get that thing off using this puller?!" LOL

And yeah, I know I suck at the internet b/c I used the website's wiki once and had a terrible time with it. I couldn't load up pics and the text format just wasn't working right. So I said screw it and vowed never to try it again - lol. But you're more than welcome to put it in there if you want.
 
#5 ·
I posted pics of my pullers before when somebody asked about them. I actually thought about that when I saw the pullers you used. The pullers you used for the lower BJ is totally the way to go. The upper is just a huge PITA if you dont have a shop press available.
 
#6 ·
Man, you ain't kiddin' about the upper being a PITA without a press! It would've been easier if we had a puller like the one used on the lower ball joint that was just a bit wider and longer, but none of the parts stores we went to had anything like that (O'Reilly's, Autozone, Pepboys). Oh, and hammering it out like was shown in the parksoffroad.com site didn't work, either. The three-jaw puller claw ends were kind of small, making it harder to grasp the thin edge of the knuckle/spindle, too, but we somehow got it done.
 
#7 · (Edited)
I didn't realize how loose the front-end was, man it drives great!

I want to thank Ed and Tony for their hard work and help with this project. :saw: Those guys are hard working, imaginative, resourceful and ingenious! I want to doubly thank Ed because he came out last night and we finished the passenger side ball-joints. Ed has more pix and a few more tricks to show you.

Thanks Ed and Tony, y'all ROCK! :xrocker:
 
#8 ·
equin said:
Man, you ain't kiddin' about the upper being a PITA without a press! It would've been easier if we had a puller like the one used on the lower ball joint that was just a bit wider and longer, but none of the parts stores we went to had anything like that (O'Reilly's, Autozone, Pepboys). Oh, and hammering it out like was shown in the parksoffroad.com site didn't work, either. The three-jaw puller claw ends were kind of small, making it harder to grasp the thin edge of the knuckle/spindle, too, but we somehow got it done.
Ed-
I've had success using the C-clamp type ball joint tool when removing the UBJ to install new control arms.- The only problem is that you will need an extended range of adapters or sockets.

Once pressure is applied to the threaded stud of the upper ball joint- Tap the UCA with a hammer and you should see separation
 
#10 ·
meithkiller said:
I didn't realize how loose the front-end was, man it drives great!

I want to thank Ed and Tony for their hard work and help with this project. :saw: Those guys are hard working, imaginative, resourceful and ingenious! I want to doubly thank Ed because he came out last night and we finished the passenger side ball-joints. Ed has more pix and a few more tricks to show you.

Thanks Ed and Tony, y'all ROCK! :xrocker:
You're more than welcome, man! It was a great learning experience. Now I ain't afraid of them ball joints no more!

And I don't know how ingenious I am cuz I stupidly forgot my digi cam at your garage last night - DOH! It should be in the cardboard box next to the fridge. If you have a way to upload the pics onto your computer so you can post 'em, feel free to do so. The ones I took last night should be the only pics on the memory card anyway. Otherwise, I might stop by tonight or tomorrow to pick it up.
 
#11 ·
grillmasterp said:
Ed-
I've had success using the C-clamp type ball joint tool when removing the UBJ to install new control arms.- The only problem is that you will need an extended range of adapters or sockets.

Once pressure is applied to the threaded stud of the upper ball joint- Tap the UCA with a hammer and you should see separation
Thanks for the tip! Are you talking about the Harbor Freight ball joint tool? We tried that on the upper, but couldn't get it to work. Would you happen to have pics on how you used it? We did find the black cups that came with it to be real useful with the 3-jaw puller, though. Anyway, we were able to pop out the old one in no time at all with the puller. In fact, it took us more time to set up the jaws on the puller than it did to pop it out. Pressing the new one back in, though, was another story!

As for the upper control arm, we got that down pat - hammer a ball joint separator pickle fork into the boot portion of the ball joint right underneath the control arm, and then while applying pressure on it, hammer the top of the stud with a small sledge. It pops right out.
 
#12 ·
Yup the HF ball joint tool
I should have taken a pic of the setup but it was late by the time I figured it out-
Got the other side off in no time
Its a less/non- destructive way to remove the BJ than the pickle fork.
 
#15 ·
grillmasterp said:
Yup the HF ball joint tool
I should have taken a pic of the setup but it was late by the time I figured it out-
Got the other side off in no time
Its a less/non- destructive way to remove the BJ than the pickle fork.
So you used it to pop it out of both the control arm and the knuckle?
 
#17 ·
valkyrie said:
and the press. :D
Now you tell us! Come on, boss! :D

Seriously though, despite doing it the long way around learning as you go and without a press, we sure learned alot, and I got over my fear of ball joints.

So about the press, what kind is it? I take it it's small enough to fit inside the wheel well, but strong enough to press those suckers in and out? The only ones I've seen for sale are the big 20-ton ones that look like you'd have to take the whole knuckle/spindle assembly off, but my guess is you have one like the SST shown in the FSM? We went to Autozone, Pepboys and O'Reilly's hoping to find something like that, but all they had were the two-jaw and 3-jaw puller types.
 
#19 ·
equin said:
You're more than welcome, man! It was a great learning experience. Now I ain't afraid of them ball joints no more!

And I don't know how ingenious I am cuz I stupidly forgot my digi cam at your garage last night - DOH! It should be in the cardboard box next to the fridge. If you have a way to upload the pics onto your computer so you can post 'em, feel free to do so. The ones I took last night should be the only pics on the memory card anyway. Otherwise, I might stop by tonight or tomorrow to pick it up.
I didn't see the camera but I did find that you left your short 19mm socket. I'll get the camera when I get home tonight.
 
#21 ·
equin said:
Dang, we couldn't figure out how to use it for that.
-It took me a while to figure out a proper combination of adapters & deep sockets- (My truck was on Jack stands and it was around midnight)
 
#22 ·
valkyrie said:
Nope, a large 20-ton shop press in the garage. Makes short work of it.

We swapped out Jacques UCA's and BJ's in a matter of a couple of hours a few weeks ago...

There's a lot of resources up here if y'all would just ask. :)
Dang, just a couple of hours - in my best Wayne's World voice, "We're not worthy, we're not worthy...." LOL!! I think it took us twice that long if not more just to do one side!

And yeah, I thought to ask for tips and advice over on our TTR board (http://www.toyotatrailriders.com/forum/showthread.php?t=2236), but since Keith asked me to come over and help him with it, I didn't feel like going over his head and asking if we could come over to your place.

As for me and my truck, I still have a drop or two leaking out of the front diff even with the new seal, but luckily I bought two more extras from Jacque - hint, hint. Maybe sometime after Jamboree? I can do most of the work, but if you, Jason, Jacque or any other experienced hand can gently drive the new seal and CV axle in, that'd be great. I always tend to drive the CV in a bit too far, causing the seal leak a bit.

Anyway, back to upper ball joints, so y'all removed the whole knuckle/spindle assembly to use the big press? What about that SST press/puller thingy in the FSM? Anywhere you know where I could get one of those at an affordable price?
 
#25 ·
equin said:
Dang, just a couple of hours - in my best Wayne's World voice, "We're not worthy, we're not worthy...." LOL!! I think it took us twice that long if not more just to do one side!

And yeah, I thought to ask for tips and advice over on our TTR board (http://www.toyotatrailriders.com/forum/showthread.php?t=2236), but since Keith asked me to come over and help him with it, I didn't feel like going over his head and asking if we could come over to your place.

As for me and my truck, I still have a drop or two leaking out of the front diff even with the new seal, but luckily I bought two more extras from Jacque - hint, hint. Maybe sometime after Jamboree? I can do most of the work, but if you, Jason, Jacque or any other experienced hand can gently drive the new seal and CV axle in, that'd be great. I always tend to drive the CV in a bit too far, causing the seal leak a bit.

Anyway, back to upper ball joints, so y'all removed the whole knuckle/spindle assembly to use the big press? What about that SST press/puller thingy in the FSM? Anywhere you know where I could get one of those at an affordable price?
My garage is everyone's garage, make sure he knows that. You seals will be a snap, may want to do them before Jambo.

Yes, simply yank the whole spindle out. No SST, just a real good assortment of pullers and junk.
 
#26 ·
valkyrie said:
My garage is everyone's garage, make sure he knows that. You seals will be a snap, may want to do them before Jambo.

Yes, simply yank the whole spindle out. No SST, just a real good assortment of pullers and junk.
Thanks, jefe. I don't know if we'll have time before the Jambo with the hectic Holiday season schedule, but if so, I may invite myself over for the help with beers in hand.