

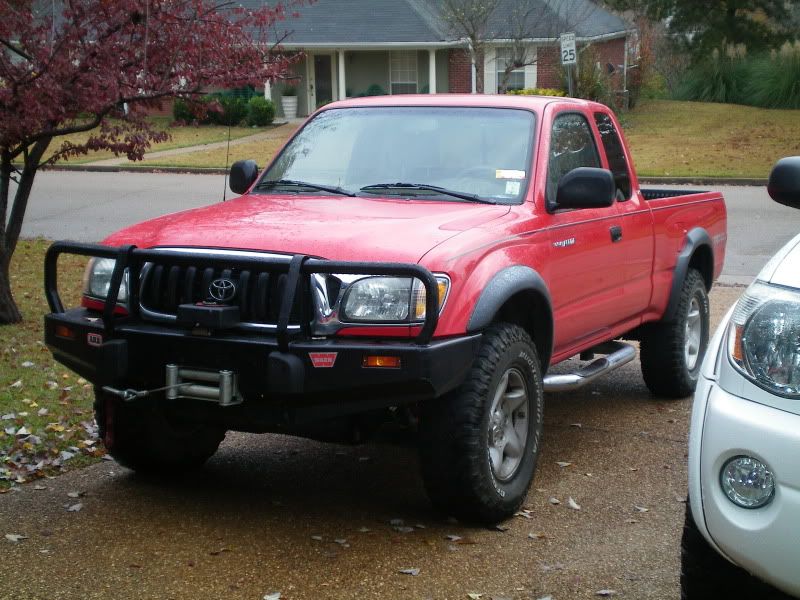
Ok guys, this won't be the most thorough of write ups, but hopefully it'll help some of yall. First things first, this was on a supercharged 03 5VZ w/ about 125K miles on it. The clutch was in terrible condition, you literally could not drive it easy enough and the clutch not slip, even at 45mph... just barely feathering the gas and it almost redlines. This is my sisters ex-bf's truck and it's been pretty well taken care of... other than all the mud on the under carriage from deer camp. I tried to take as many pics as possible, but eventually you're covered in dirt and not in the mood to fuck w/ a digi-cam.
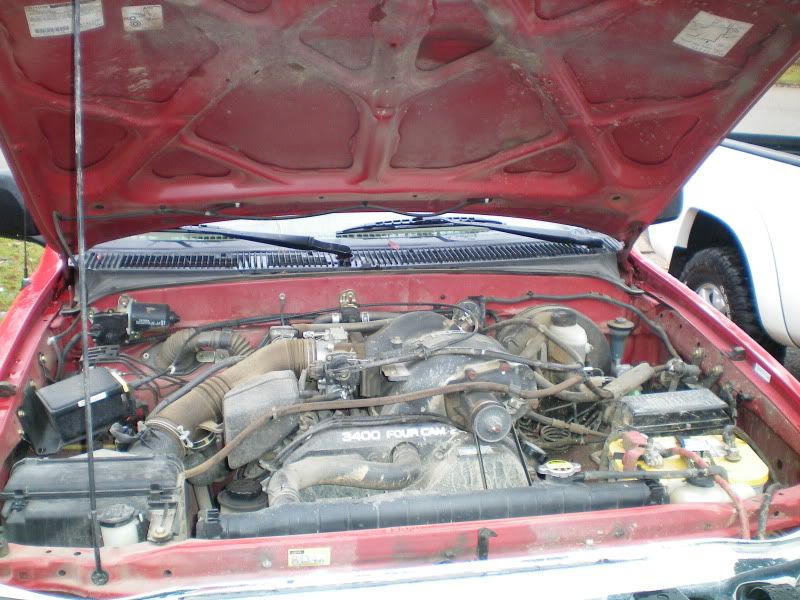
Here's the culprit/victim
![Image]()
![Image]()
The truck almost didn't fit in the garage due to having an ARB and me having a junk desk that takes up too much damn room.
![Image]()
![Image]()
That woulda been bad b/c all my tools are in the garage. It just barely fit.
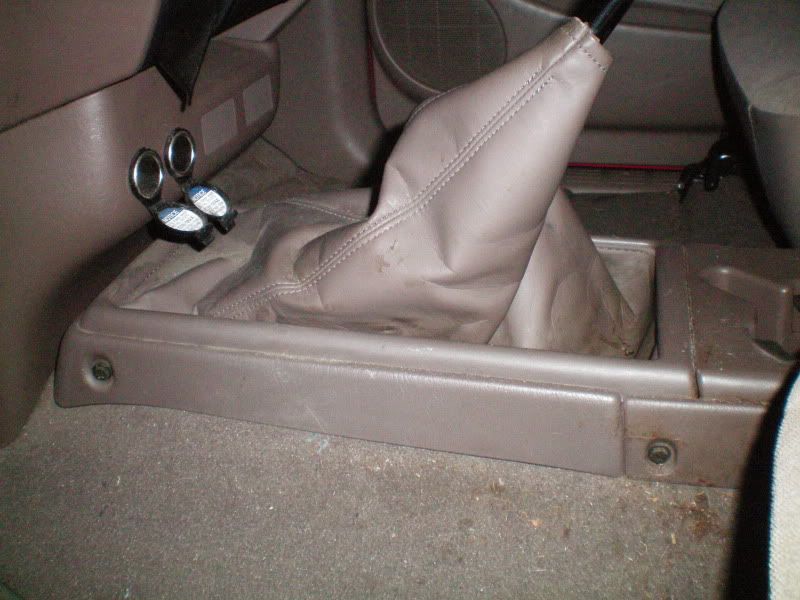
First things first, gotta start w/ taking the shifters out.
![Image]()
The shifter balls just screw onto the shifters, any retard can figure that out. Once you remove those, you've got 4 small screws to remove on the shifter cover, 2 at the front and 2 that connect it to the center console.
![Image]()
Once you've got the shifter cover off, you've got the rubber shifter boots and retainer plate to remove, you've got 4 screws there... Then boom, you see the top of the transmission and transfer case.
![Image]()
![Image]()
On the transmission shifter, the retainer plate is held down by 2 tabs and it's spring loaded... so you have to push down the retainer and turn it counter clockwise and the shifter will come loose. I didn't get a pic of this, b/c I felt like it was pretty self explanatory.
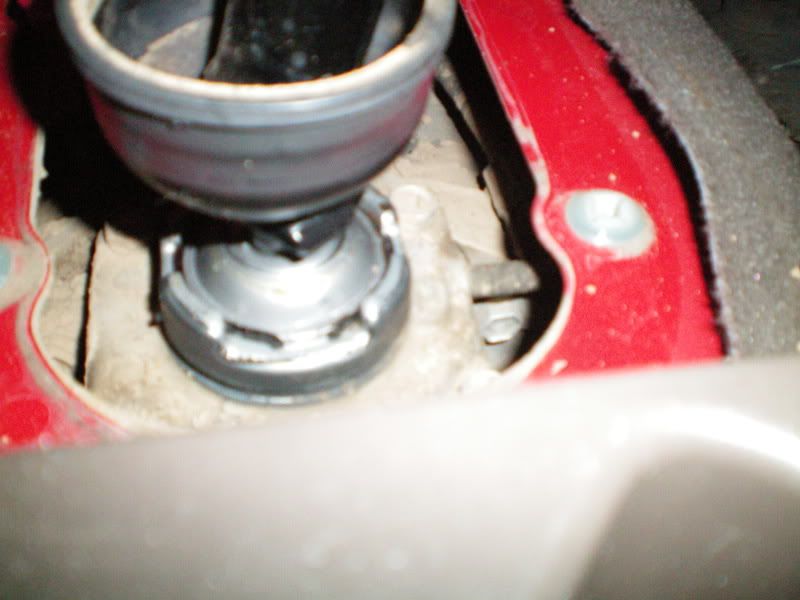
The transfercase shifter, always shift into 4Hi when removing this. However, this is held in place by a snap ring so you'll need snap ring pliers to get it out and back in. Be careful though, b/c you don't wanna lose this.
![Image]()
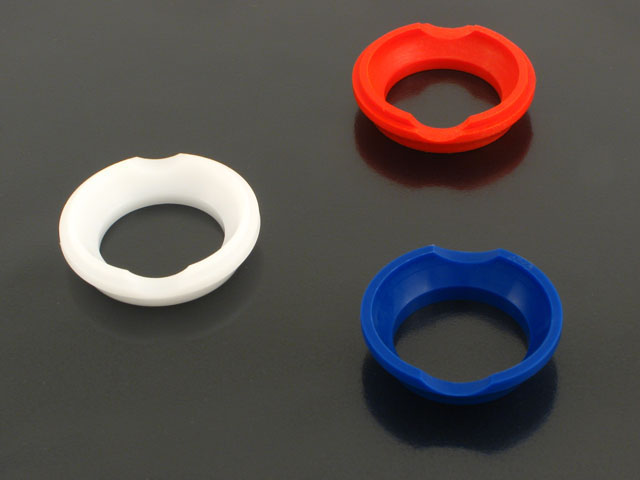
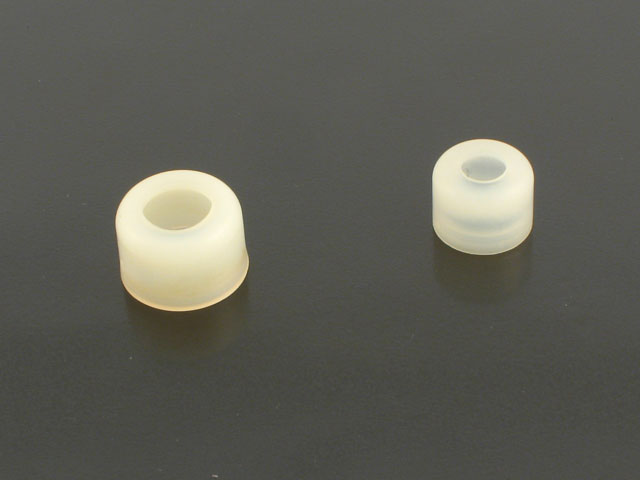
Once you have both shifters out, inspect the shifter bushings, most of the time, the bushing that the shifter sits in is gonna basically separate once you pull it out. You can go back w/ stock or you can hit up Marlin Crawler for these:
![Image]()
and these:
![Image]()
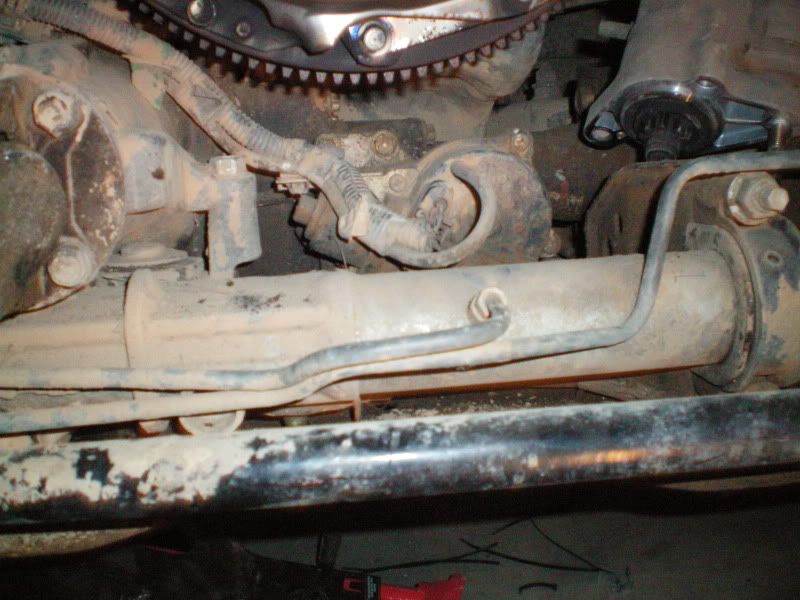
See what I mean by caked under carriage???
![Image]()
To avoid this any shit dropping in your eye, pressure was the under carriage before you start any work. Dirt does hide on top of the transmission and transfer case, however.
First, go ahead and hit your driveshaft bolts w/ some pb-blaster(especially if it's friday night and you're gonna start this on a Saturday). Break all the drive shaft bolts loose, and get those outta the way.
Go ahead and disconnect your slave cylinder from the bellhousing, so you don't kink any of the hard lines up once the transmission tilts down.
You're gonna wanna remove the starter bolts before any bellhousing bolts, just to keep things in order. I highly recommend using a ziploc baggie system w/ a sharpie to label all the bolts as to not get any mixed up. You can remove all the bellhousing bolts w/o removing the crossmember, except for the top bolts. B/c the transmission is gonna have to lean down in order to really get to the top bellhousing bolts. You're gonna need several extensions and swivels(aka u-joints) in order to access the upper bolts. I used all hand tools on this project b/c my impact gun doesn't supply enough torque to really break those bolts loose.
You're gonna have a few sensors to disconnect on the transmission and transfercase before you can pull it out. You've got the speedo signal sensor(or cable on older model Tacoma's that don't use a digital speedo), the reverse light sensor(passenger side of the transmission, 2 wire connector), 4WD gauge light sensor(on the passenger side of the transfercase)... then last but certainly not least, the first o2 sensor. I'm gonna go ahead and tell you, that thing is a BITCH! The bracket is bolted to the top of the transmission w/ one of the bolts that holds the tailshaft housing to the transmission case, so the bolt is long as shit and you have ZERO room to really work. You'll get 1/4 turns each time, pretty much, very frustrating. You might be able to just unhook the sensor, but this truck was very caked and I could make heads or tails of how to disconnect the sensor w/ only feeling w/ my hands and not being able to put my eyes on it. The whole wiring harness really needs to be unclipped from the transmission, and be prepared to break a couple of those clips. There's not enough slack in harness for it to hang and get tangled up on anything though if you do break some clips.
Now comes the fun part, and I HIGHLY recommend either renting or purchasing a transmission jack. Northwestern tools(along w/ many others) make adapters for regular floor jacks to utilize them as a transmission jack, but either way, it's nice to have something to chain the transmission down w/ so it doesn't start to roll on you once you start pulling it out. I ran into some trouble w/ the front drive shaft and I couldn't get it disconnected at the flange, so I had to let it slip apart. There's really not much room to work on that either b/c the rack and pinion gets in the way real quick. When I dropped the trans, it nailed the lines going to the rack and pinion, but luckily, just a little cosmetic damage, nothing major.
![Image]()
This is the stock pressure plate still in place...
![Image]()
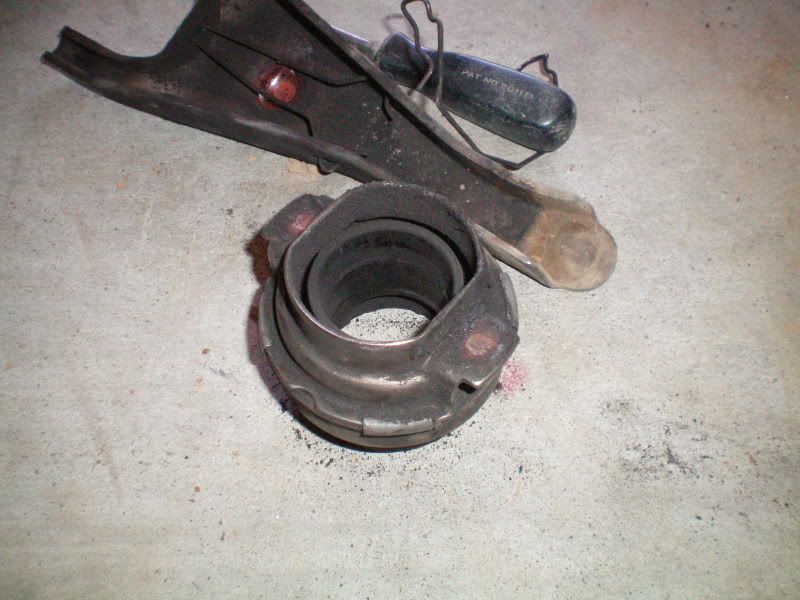
This throwout bearing was BAD BAD BAD off... it was literally almost seized up.
![Image]()
Anyone notice any hot spots? HA!
![Image]()
![Image]()
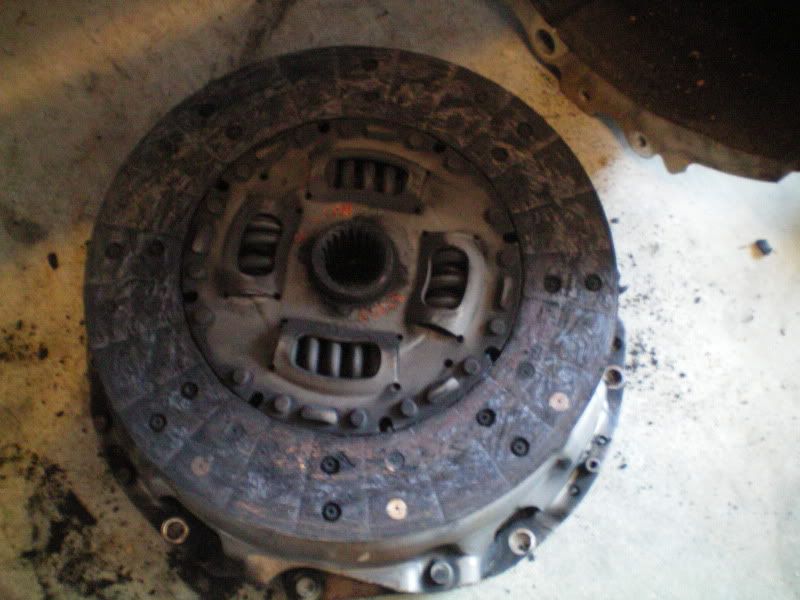
This is the stock clutch, it was worn down to the rivets and completely glazed over. This is bad.
![Image]()
![Image]()
While you're doing a clutch job, it's ALWAYS ALWAYS ALWAYS a good idea to replace this little fella...
![Image]()
The flywheel has to come off to get resurfaced, and you're right there at it, and these trucks are notorious for leaking at the rear main once the miles start racking up. Plus, the seals are like $8, so it's cheap insurance. Why have to basically redo all this work a couple months down the road for just once little round seal??? I'm not gonna go into great detail how to do this, b/c if you've gotten this far, you can figure out how to do this little chore.
I took the flywheel to a local machine shop to have it resurfaced, this is the 2nd flywheel they've done for me, but they've done other work for me... top notch stuff and the guy knows his shit about anything that has an internal combustion engine.
Here's the pretty newly resurfaced flywheel...
![Image]()
That was the last pic I took b/c I was tired of fucking w/ it and I wanted to get done, so the rest of this will be all text.
Most pilot bearing pullers that you can rent at the parts store are too big to fit in a Tacoma pilot bearing. If you take this project on yourself, the best way to get it out is w/ a blind hole puller from autozone. It's a lot like a pilot bearing puller, but the tip is smaller and it'll go in the pilot bearing. You can then tighten it to adjust it, and it'll widen while it's in the pilot bearing, grabbing a hold of it. Then you just use the slide hammer to yank it out.
Here's a pic of one to help you get an idea if you don't know what it looks like.
![Image]()
I then put the flywheel back on and torqued the bolts down to 63 ft-lbs as recommended. USE LOCTITE!!!! I can't emphasize this enough. You're gonna have to wedge something between the frame and the flywheel to hold it still while you torque on it... or put a death grip on it w/ your other hand and torque it. This method is a bitch.
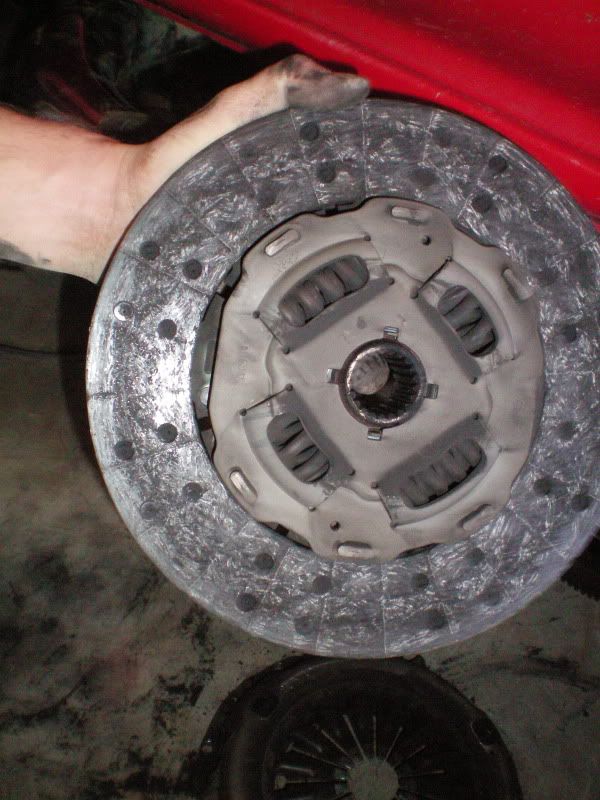
After you've got the flywheel torqued down, break out your new clutch set and start reassembling and make sure you have your clutch facing the correct way, put your clutch alignment tool in the splines of the clutch disc, then put the pressure plate on the pegs and hold all this w/ your hand while you start the bolts for the pressure plate on the flywheel. Begin tightening down the pressure plate and making sure you keep the disc lined up using the alignment tool. Torque the pressure plate down to 14 ft-lbs.
Clean your bellhousing out w/ some brake cleaner to get all the clutch disc dust out. Take some good grease and grease the pivot ball for the clutch fork, then put a little light coat on the fork where the throwout bearing rests and hook all that up. One rookie mistake that anyone can make is not allowing the clutch fork to come out far enough. If you do this, it won't allow the slave cylinder to line up correctly w/ the dimple in the clutch fork. This could spell a quick death for your slave cylinder, as the piston isn't going straight and it'll ruin the seal b/c it's rubbing on the seal at an awkward angle.
Once you've got your throwout bearing and clutch fork in place, everything else is basically the reverse order. You're gonna wanna get the transmission jacked up and in place, and you might have to spin the rear driveshaft flange to line up the splines. BUT, typically you can get it on the first try. Then just get your bellhousing bolts started, and once you've got it up there, again, check your clutch fork to make sure you've got it out far enough for the slave cylinder to mate up good. After you've done everything in the reverse order, you're just about done.
You can use a power bleeder for the last step or you can use a friend to do the old fashion clutch bleed. I used my power bleeder, but I didn't feel like I was getting that firm of a pedal on it. For those of you that don't know how to bleed a clutch, it's real simple. Make sure the clutch master cylinder reservoir is full, then have a friend pump the pedal about 9 or 10 times and then hold it to the floor. You're gonna get under the truck and crack the bleeder valve(just a little though) to let the air bubbles out. Then snug the bleeder back up. Have your buddy pump the pedal and hold it again to let more out. You're gonna keep doing this until you get a firm pedal feel. Typically after 3 or 4 times of this, you'll get a good feel.
Some people go ahead and replace the clutch hydraulics w/ a new clutch, as like the rear main seal, it's just cheap insurance. If you do this, you're probably gonna have to adjust the pedal throw.
If anyone has any questions about any of this, feel free to ask. If I left a step out, I'm sure it'll come to me. Hopefully this can be added as a sticky and it'll help some of you guys in the future.
Here's the culprit/victim
The truck almost didn't fit in the garage due to having an ARB and me having a junk desk that takes up too much damn room.
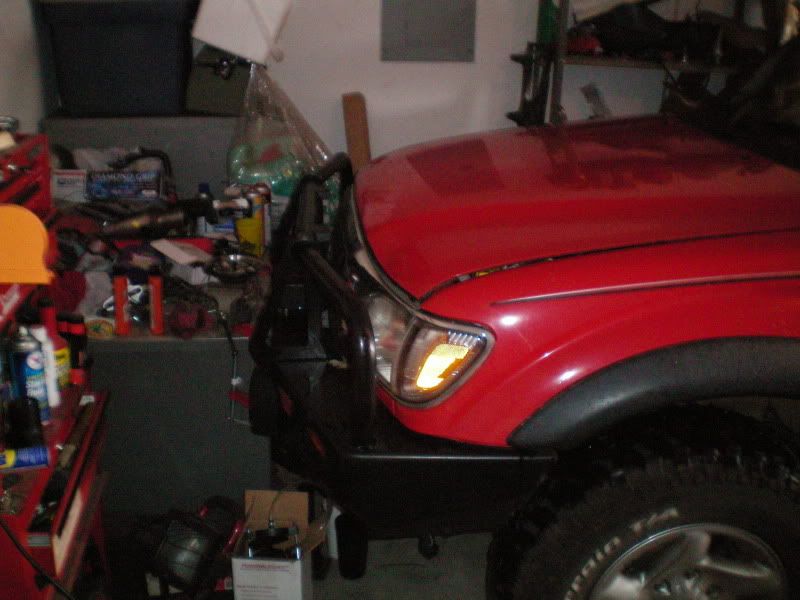
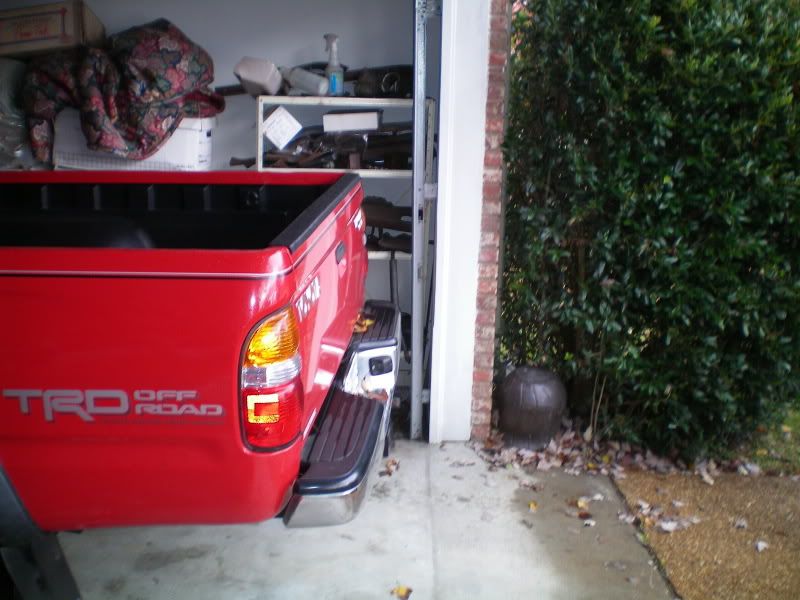
That woulda been bad b/c all my tools are in the garage. It just barely fit.
First things first, gotta start w/ taking the shifters out.

The shifter balls just screw onto the shifters, any retard can figure that out. Once you remove those, you've got 4 small screws to remove on the shifter cover, 2 at the front and 2 that connect it to the center console.
Once you've got the shifter cover off, you've got the rubber shifter boots and retainer plate to remove, you've got 4 screws there... Then boom, you see the top of the transmission and transfer case.
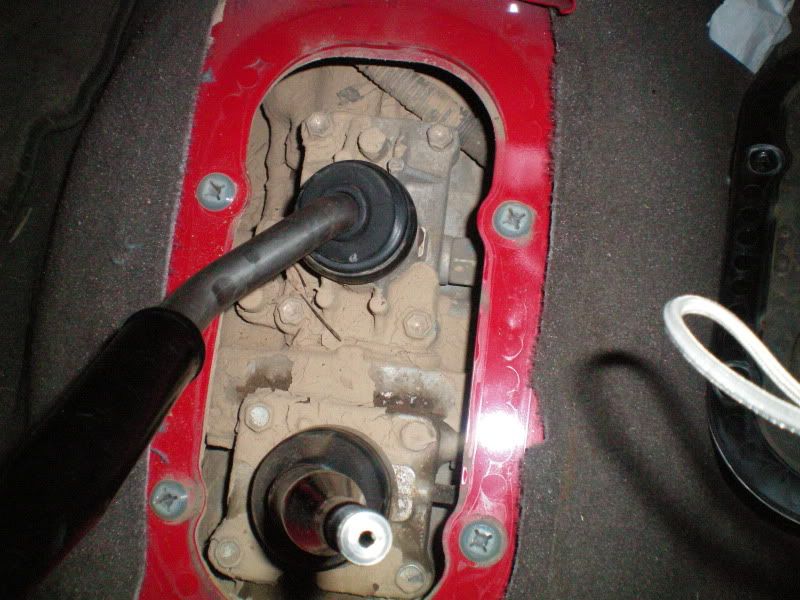
On the transmission shifter, the retainer plate is held down by 2 tabs and it's spring loaded... so you have to push down the retainer and turn it counter clockwise and the shifter will come loose. I didn't get a pic of this, b/c I felt like it was pretty self explanatory.
The transfercase shifter, always shift into 4Hi when removing this. However, this is held in place by a snap ring so you'll need snap ring pliers to get it out and back in. Be careful though, b/c you don't wanna lose this.
Once you have both shifters out, inspect the shifter bushings, most of the time, the bushing that the shifter sits in is gonna basically separate once you pull it out. You can go back w/ stock or you can hit up Marlin Crawler for these:
and these:
See what I mean by caked under carriage???
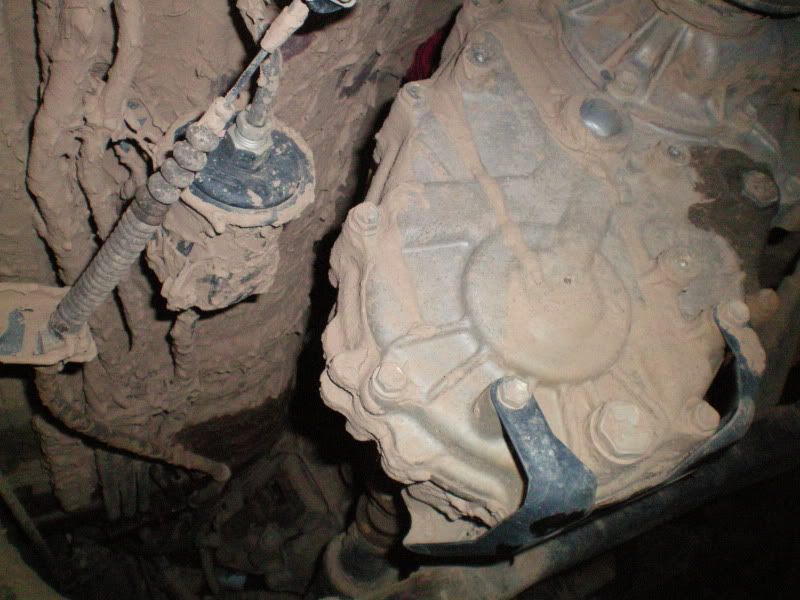
To avoid this any shit dropping in your eye, pressure was the under carriage before you start any work. Dirt does hide on top of the transmission and transfer case, however.
First, go ahead and hit your driveshaft bolts w/ some pb-blaster(especially if it's friday night and you're gonna start this on a Saturday). Break all the drive shaft bolts loose, and get those outta the way.
Go ahead and disconnect your slave cylinder from the bellhousing, so you don't kink any of the hard lines up once the transmission tilts down.
You're gonna wanna remove the starter bolts before any bellhousing bolts, just to keep things in order. I highly recommend using a ziploc baggie system w/ a sharpie to label all the bolts as to not get any mixed up. You can remove all the bellhousing bolts w/o removing the crossmember, except for the top bolts. B/c the transmission is gonna have to lean down in order to really get to the top bellhousing bolts. You're gonna need several extensions and swivels(aka u-joints) in order to access the upper bolts. I used all hand tools on this project b/c my impact gun doesn't supply enough torque to really break those bolts loose.
You're gonna have a few sensors to disconnect on the transmission and transfercase before you can pull it out. You've got the speedo signal sensor(or cable on older model Tacoma's that don't use a digital speedo), the reverse light sensor(passenger side of the transmission, 2 wire connector), 4WD gauge light sensor(on the passenger side of the transfercase)... then last but certainly not least, the first o2 sensor. I'm gonna go ahead and tell you, that thing is a BITCH! The bracket is bolted to the top of the transmission w/ one of the bolts that holds the tailshaft housing to the transmission case, so the bolt is long as shit and you have ZERO room to really work. You'll get 1/4 turns each time, pretty much, very frustrating. You might be able to just unhook the sensor, but this truck was very caked and I could make heads or tails of how to disconnect the sensor w/ only feeling w/ my hands and not being able to put my eyes on it. The whole wiring harness really needs to be unclipped from the transmission, and be prepared to break a couple of those clips. There's not enough slack in harness for it to hang and get tangled up on anything though if you do break some clips.
Now comes the fun part, and I HIGHLY recommend either renting or purchasing a transmission jack. Northwestern tools(along w/ many others) make adapters for regular floor jacks to utilize them as a transmission jack, but either way, it's nice to have something to chain the transmission down w/ so it doesn't start to roll on you once you start pulling it out. I ran into some trouble w/ the front drive shaft and I couldn't get it disconnected at the flange, so I had to let it slip apart. There's really not much room to work on that either b/c the rack and pinion gets in the way real quick. When I dropped the trans, it nailed the lines going to the rack and pinion, but luckily, just a little cosmetic damage, nothing major.
This is the stock pressure plate still in place...

This throwout bearing was BAD BAD BAD off... it was literally almost seized up.
Anyone notice any hot spots? HA!
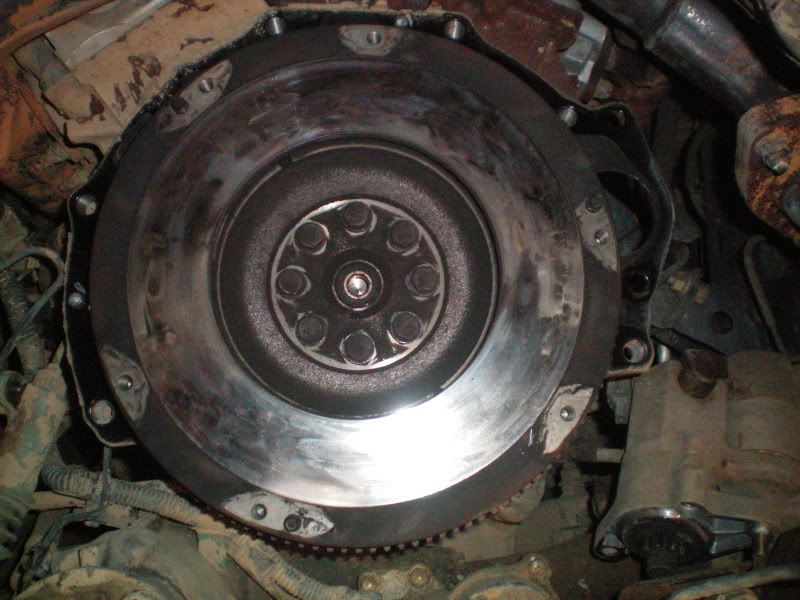
This is the stock clutch, it was worn down to the rivets and completely glazed over. This is bad.
While you're doing a clutch job, it's ALWAYS ALWAYS ALWAYS a good idea to replace this little fella...
The flywheel has to come off to get resurfaced, and you're right there at it, and these trucks are notorious for leaking at the rear main once the miles start racking up. Plus, the seals are like $8, so it's cheap insurance. Why have to basically redo all this work a couple months down the road for just once little round seal??? I'm not gonna go into great detail how to do this, b/c if you've gotten this far, you can figure out how to do this little chore.
I took the flywheel to a local machine shop to have it resurfaced, this is the 2nd flywheel they've done for me, but they've done other work for me... top notch stuff and the guy knows his shit about anything that has an internal combustion engine.
Here's the pretty newly resurfaced flywheel...

That was the last pic I took b/c I was tired of fucking w/ it and I wanted to get done, so the rest of this will be all text.
Most pilot bearing pullers that you can rent at the parts store are too big to fit in a Tacoma pilot bearing. If you take this project on yourself, the best way to get it out is w/ a blind hole puller from autozone. It's a lot like a pilot bearing puller, but the tip is smaller and it'll go in the pilot bearing. You can then tighten it to adjust it, and it'll widen while it's in the pilot bearing, grabbing a hold of it. Then you just use the slide hammer to yank it out.
Here's a pic of one to help you get an idea if you don't know what it looks like.

I then put the flywheel back on and torqued the bolts down to 63 ft-lbs as recommended. USE LOCTITE!!!! I can't emphasize this enough. You're gonna have to wedge something between the frame and the flywheel to hold it still while you torque on it... or put a death grip on it w/ your other hand and torque it. This method is a bitch.
After you've got the flywheel torqued down, break out your new clutch set and start reassembling and make sure you have your clutch facing the correct way, put your clutch alignment tool in the splines of the clutch disc, then put the pressure plate on the pegs and hold all this w/ your hand while you start the bolts for the pressure plate on the flywheel. Begin tightening down the pressure plate and making sure you keep the disc lined up using the alignment tool. Torque the pressure plate down to 14 ft-lbs.
Clean your bellhousing out w/ some brake cleaner to get all the clutch disc dust out. Take some good grease and grease the pivot ball for the clutch fork, then put a little light coat on the fork where the throwout bearing rests and hook all that up. One rookie mistake that anyone can make is not allowing the clutch fork to come out far enough. If you do this, it won't allow the slave cylinder to line up correctly w/ the dimple in the clutch fork. This could spell a quick death for your slave cylinder, as the piston isn't going straight and it'll ruin the seal b/c it's rubbing on the seal at an awkward angle.
Once you've got your throwout bearing and clutch fork in place, everything else is basically the reverse order. You're gonna wanna get the transmission jacked up and in place, and you might have to spin the rear driveshaft flange to line up the splines. BUT, typically you can get it on the first try. Then just get your bellhousing bolts started, and once you've got it up there, again, check your clutch fork to make sure you've got it out far enough for the slave cylinder to mate up good. After you've done everything in the reverse order, you're just about done.
You can use a power bleeder for the last step or you can use a friend to do the old fashion clutch bleed. I used my power bleeder, but I didn't feel like I was getting that firm of a pedal on it. For those of you that don't know how to bleed a clutch, it's real simple. Make sure the clutch master cylinder reservoir is full, then have a friend pump the pedal about 9 or 10 times and then hold it to the floor. You're gonna get under the truck and crack the bleeder valve(just a little though) to let the air bubbles out. Then snug the bleeder back up. Have your buddy pump the pedal and hold it again to let more out. You're gonna keep doing this until you get a firm pedal feel. Typically after 3 or 4 times of this, you'll get a good feel.
Some people go ahead and replace the clutch hydraulics w/ a new clutch, as like the rear main seal, it's just cheap insurance. If you do this, you're probably gonna have to adjust the pedal throw.
If anyone has any questions about any of this, feel free to ask. If I left a step out, I'm sure it'll come to me. Hopefully this can be added as a sticky and it'll help some of you guys in the future.
")


